Easily publish a post on Pixelfed in PHP

10 February 2025 - 540 mots - php

Pixelfed is a decentralized social network designed for sharing photos and images, offering an ethical and privacy-friendly alternative to platforms like Instagram. Based on the ActivityPub protocol, it allows users to create or join independent instances, while interacting with the federation as a whole. With an ad-free approach, total respect for personal data and familiar features such as albums, stories and interactions, Pixelfed offers a community experience focused on transparency and creativity.

Logo Pixelfed

After this presentation of the Pixelfed service, we’ll publish a post on the Pixelfed network with PHP.

Prerequisites

First of all, you need an account on a Pixelfed instance. In my case, I’m using the pixelfed.social instance.

You also need a personal access token.

To do this

  • Connect to your Pixelfed instance
  • Click on your avatar in the top right-hand corner
  • Click on “Profile
  • Click on the “Edit profile” button
  • Click on the “Applications” tab
  • Click on the “Create New Token” link
  • Define the application name: in our case, I’ll call it “PixelBot”.
  • Check the write extents
  • Click on the “Create” button
  • Retrieve your personal access token

Theory

Pixelfed uses (more or less) the same endpoints as Mastodon, whose documentation is available online.

In our case, we’ll use :

Implementation

We’ll be implementing PHP 8.4 with the Curl extension installed and enabled.

 1
 2
 3
 4
 5
 6
 7
 8
 9
10
11
12
13
14
15
16
17
18
19
20
21
22
23
24
25
26
27
28
29
30
31
32
33
34
35
36
37
38
39
40
41
42
43
44
45
46
47
48
49
50
51
52
53
54
55
56
57
58
59
60
61
62
63
64
65
66
67
68
69
70
71
72
73
74
75
76
77
78
79
80
81
82
83
<?php

const PIXELFED_ACCESS_TOKEN = 'XXXXXXXXXXXXXXXXXXXXXXXX';
const PIXELFED_INSTANCE = 'https://pixelfed.social';

enum PixelfedStatusVisibility: string
{
  case Direct = 'direct';
  case Private = 'private';
  case Public = 'public';
  case Unlisted = 'unlisted';
}

function fnPostPixelfed(
  string $pathMedia,
  string $descriptionMedia,
  string $status,
  string $language = 'en',
  PixelfedStatusVisibility $visibility = PixelfedStatusVisibility::Public
  
) {
  // Upload the media
  $hCurl = curl_init();
  curl_setopt_array($hCurl, [
    CURLOPT_URL => PIXELFED_INSTANCE . '/api/v1/media',
    CURLOPT_RETURNTRANSFER => true,
    CURLOPT_POST => true,
    CURLOPT_HTTPHEADER => [
      'Authorization: Bearer '.PIXELFED_ACCESS_TOKEN,
      'Accept-Charset: utf-8'
    ],
    CURLOPT_POSTFIELDS => [
      'file' => curl_file_create($pathMedia, 'image/jpg', $pathMedia),
      'description' => $descriptionMedia,
    ],
    CURLOPT_TIMEOUT => 20
  ]);
  $response1 = curl_exec($hCurl);
  curl_close($hCurl);
  $mediaResponse = json_decode($response1, true);

  // Post the status
  $hCurl = curl_init();
  curl_setopt_array($hCurl, [
    CURLOPT_URL => PIXELFED_INSTANCE . '/api/v1/statuses',
    CURLOPT_RETURNTRANSFER => true,
    CURLOPT_POST => true,
    CURLOPT_HTTPHEADER => [
      'Authorization: Bearer '.PIXELFED_ACCESS_TOKEN,
      'Content-Type: application/json',
      'Accept: application/json',
      'Accept-Charset: utf-8'
    ],
    CURLOPT_POSTFIELDS => json_encode([
      'status' => $status,
      'language' => $language,
      'visibility' => $visibility->value,
      'media_ids' => [
        $mediaResponse['id'],
      ],
    ]),
    CURLOPT_TIMEOUT => 20
  ]);
  $response2 = curl_exec($hCurl);
  curl_close($hCurl);

  return json_decode($response2, true);
}

// Use a generated image for testing
$dataImage = file_get_contents('https://picsum.photos/400/600');
file_put_contents('generated.jpg', $dataImage);

$response = fnPostPixelfed(
  'generated.jpg',
  'Generated Media',
  '🚧 Ceci est un test 🚧',
  'fr'
);

var_dump($response['url']);

@unlink('generated.jpg');

As you can see, uploading is a two-stage process: first, media upload, then post creation.

Conclusion

After simply executing the code, here’s how it looks:

Result

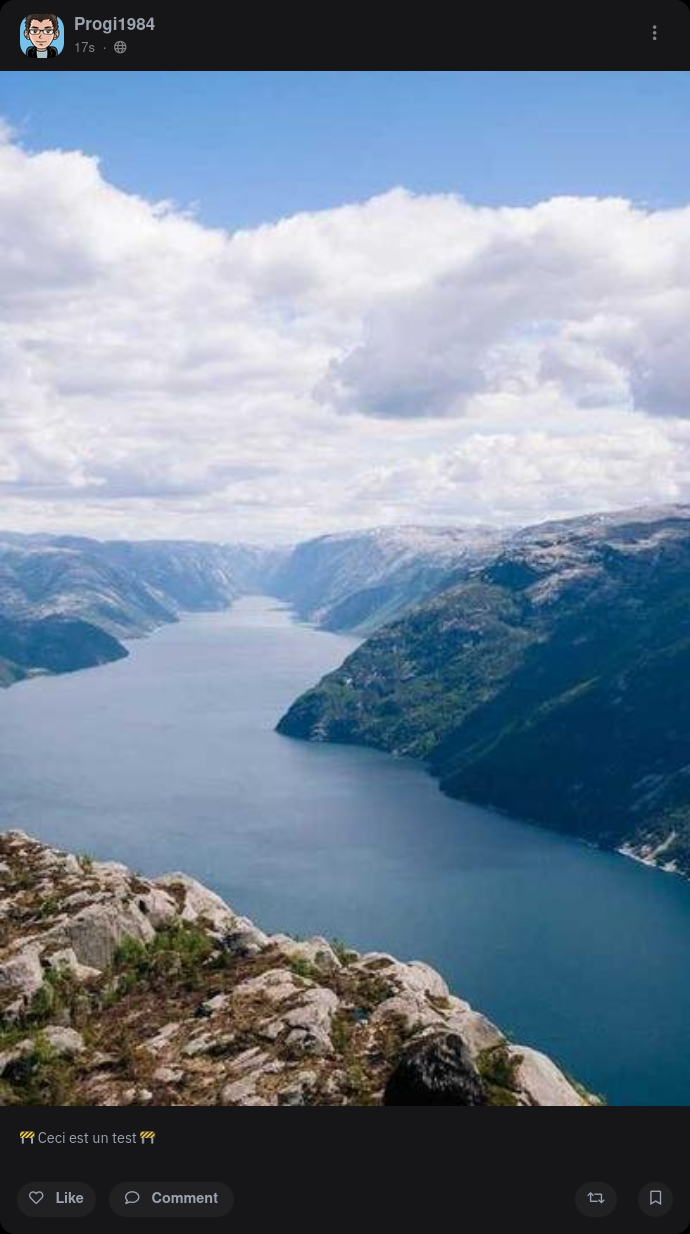
After running the code, you’ll notice that

  • the application name is not displayed
  • emojis can also be easily used in the code.

Laisser un commentaire

Merci. Votre message a bien été enregistré.