Setting up DNS is an essential step in linking your domain name to your hosting. If you have a domain with OVH and would like to use O2Switch DNS, this practical guide will take you step by step through the optimum configuration to ensure your site runs smoothly.
OVH : Reduce the OVH TTL
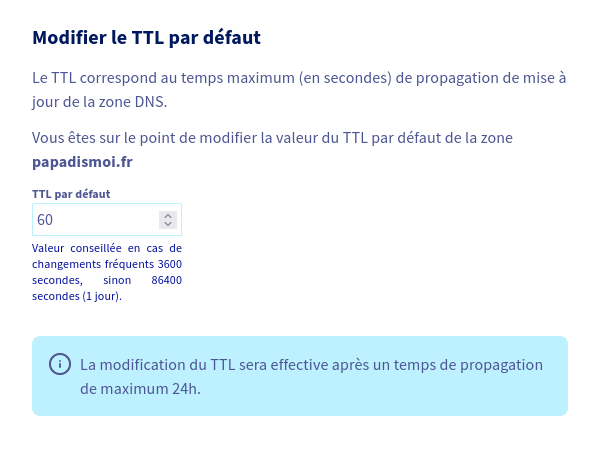
The first step is to reduce the TTL of your domain name at OVH to reduce DNS propagation time.
After logging into your OVH account :
- Go to the “Domain name” tab
- Go to the “DNS Zone” tab
- Click on the “Modify default TTL” button
O2Switch: Add domain name
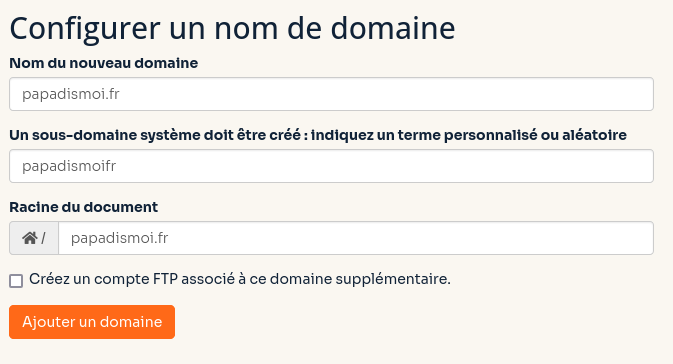
The second step takes place at O2Switch. You need to add the domain to be able to manage it.
After logging in to your O2Switch account :
- Go to Technical Area
- Go to “Configured domains
- Configure a domain name
OVH : Change DNS servers
Go back to OVH and tell them to use O2Switch’s DNS servers
- Go to the “Domain name” tab
- Go to the “DNS Servers” tab
- Click on the “Modify DNS servers” button
- Select “Use my own DNS
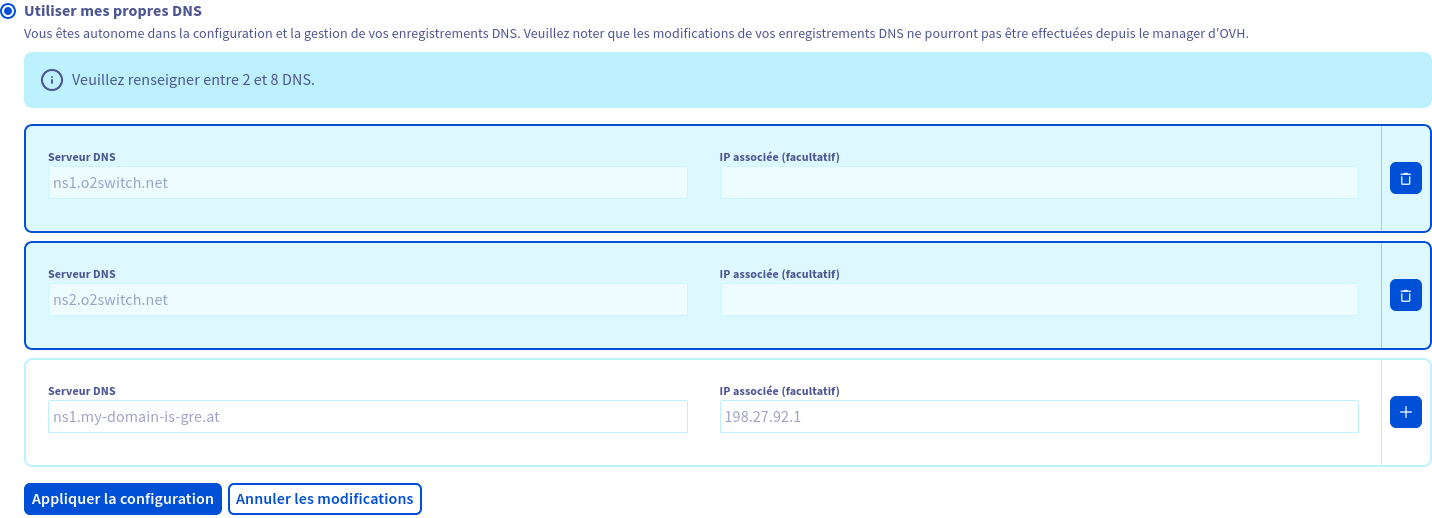
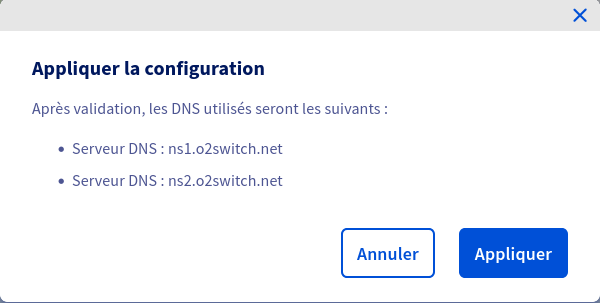
- Validate configuration
- That enable the migration on the fly

- Wait until it’s ok on the OVH side

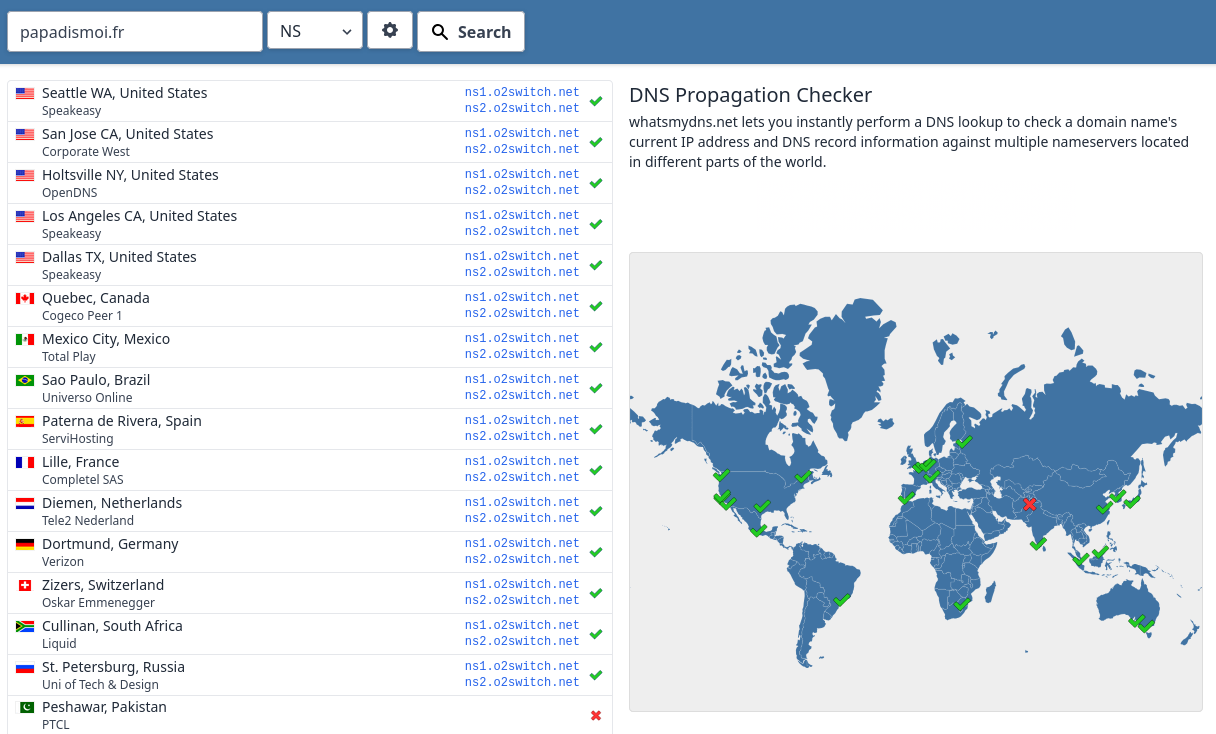
Wait and See
After that, you need to wait for DNS propagation.